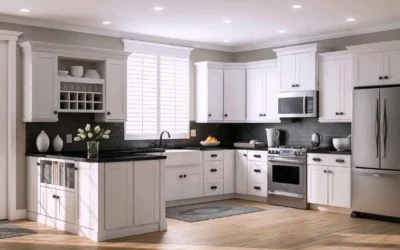
Are your wood cabinets making your kitchen feel dated and uninspired? You don’t need a full renovation to transform the heart of your home. With a bit of time, patience, and the right technique, you can give your wood kitchen cabinets a professional-grade makeover that looks stunning—and all without breaking the bank.
Painting your kitchen cabinets is one of the most cost-effective ways to refresh your space while adding your own personal style. This comprehensive guide will walk you step-by-step through how to paint wood kitchen cabinets like a pro. Whether you’re a complete beginner or a seasoned DIYer, you’ll find the advice you need to achieve flawless results.
Why Painting Wood Cabinets Is Worth It
Before grabbing a paintbrush, it’s worth understanding the huge benefits of painting your kitchen cabinets:
- Save Money: Replacing your kitchen cabinets is expensive, often costing thousands of dollars. Painting your existing cabinets is an affordable alternative that can achieve a brand-new look without the hefty price tag.
- Customised Look: Tired of the colour but still love your cabinet style? Painting gives you unlimited design flexibility. Opt for timeless neutrals or make a bold statement with trendier tones like navy blue or sage green.
- Increase Home Value: A clean and modern kitchen appeals to prospective buyers. Professionally painted cabinets can boost resale value, making this DIY upgrade a smart investment.
If you’re convinced that this project is worth it, read on to get started!
What You’ll Need to Paint Kitchen Cabinets
Before you begin, gather these tools and materials to make the process smoother and more efficient:
Supplies for Prepping
- Screwdriver (to remove hardware and doors)
- Drop cloths or plastic sheeting (protect floors and counters)
- Painter’s tape (for precise paint lines)
- Degreaser or TSP substitute (to clean surfaces)
- Sandpaper or a sanding sponge (grit level 120–180)
Painting Essentials
- Bonding primer or stain-blocking primer (critical for adhesion)
- Cabinet-grade paint (choose semi-gloss or satin finishes for durability)
- Angled brush (for detailed edges and corners)
- Foam roller (ideal for smooth, streak-free coats)
- Paint tray
- Tack cloth or lint-free rags (to clear sanding dust)
Step-by-Step Guide to Painting Wood Kitchen Cabinets
Step 1: Remove Doors and Hardware
Take off all cabinet doors, drawers, and hardware (including hinges). For easy reinstallation, label each door and store screws and hinges in labelled bags. This step ensures you paint all surfaces evenly without missing any details.
Step 2: Clean the Cabinets Thoroughly
Kitchen cabinets are often coated with grease, residue, and grime, which can prevent paint from adhering properly. Use a degreaser or TSP substitute with a sponge to clean every surface, focusing on areas around handles and edges. Allow everything to dry completely before moving on.
Step 3: Sand the Surfaces
Lightly sand all exposed cabinet surfaces, including doors, frames, and drawer fronts. The goal is to roughen the finish so the primer and paint adhere better. Be careful not to sand too aggressively—you’re looking for light scuffing, not bare wood. After sanding, wipe down surfaces with a tack cloth to remove dust.
Step 4: Protect Surrounding Areas
Protect your kitchen counters, floors, and walls from accidental paint splatters by using painter’s tape and drop cloths. Mask areas you don’t want to paint, like backsplashes or adjacent cabinetry, for neat, professional-looking results.
Step 5: Prime the Cabinets
Priming is non-negotiable! Apply a high-quality bonding primer to ensure the paint sticks and to block any stains or wood knots from bleeding through. Use an angled brush for corners and edges, and a foam roller for larger, flat surfaces. Allow the primer to cure fully before painting (check the label for drying times).
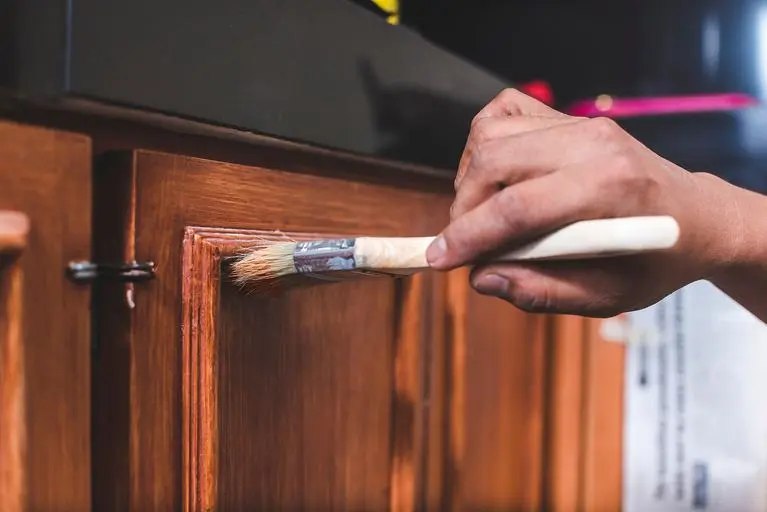
Step 6: Apply the Paint
Now for the fun part! Use a cabinet-grade paint designed for durability and easy cleaning. Apply light, even coats with a foam roller for the broad surfaces. Use an angled brush for small crevices and edges. Thin coats prevent drips and ensure a smooth finish, though you’ll likely need two coats for full coverage. Allow each layer to dry completely before adding the next.
Step 7: Reassemble and Admire
Once the final coat cures—this typically takes 24 to 48 hours—reinstall your hardware and reattach doors and drawers. Step back and savour your stunning new cabinets!
read more: How to Clean Wood Kitchen Cabinets: A Step-by-Step Guide
Tips for a Flawless Finish
- Use the Right Paint: Choose alkyd or acrylic enamel paint for a long-lasting, scratch-resistant finish.
- Control Temperature and Dust: Work in a clean, ventilated space. Ideal painting conditions are between 15–25°C (59–77°F) to prevent drips or problems with adhesion.
- Be Patient: Rushing the process (like skipping prep work or applying paint too thickly) can result in uneven layers and poor durability.
Avoid These Common Cabinet Painting Mistakes
Painting cabinets can transform your space, but common mistakes can lead to uneven finishes, peeling paint, or wasted effort. Here’s what to avoid and why:
1. Skipping Cleaning or Sanding Steps
Dirty or greasy cabinets can prevent paint from adhering properly and cause peeling or chipping over time. Always clean cabinets thoroughly with a degreaser and sand them to remove the old finish and create a smooth surface for the paint to stick. Skipping these steps can lead to a paint job that lasts only a fraction of the usual lifespan—well-prepped cabinets can last up to 10 years without needing a repaint.
2. Neglecting to Prime
Priming cabinets is essential to seal the surface, prevent stains from bleeding through, and ensure the paint adheres evenly. Using a quality primer can also reduce the number of paint coats needed, saving time and money. Without priming, you may end up with patchy or uneven results, especially on wood or laminate surfaces, which are notorious for soaking up paint inconsistently.
3. Using Wall Paint Instead of Cabinet Paint
Wall paint is not designed to handle the wear and tear that cabinets endure daily. Cabinets require durable, high-adhesion paint specifically formulated for furniture or cabinetry. According to experts, using the wrong type of paint can result in chipping within months, especially in high-traffic areas like kitchens or bathrooms. Invest in cabinet-grade paint for a professional, long-lasting finish.
4. Reattaching Hardware Before the Paint Is Fully Cured
Cabinet paint takes time to cure fully—often up to 7 days, depending on the type of paint. If you reattach hardware too soon, it can damage the paint before it hardens completely, leading to smudges, scratches, or peeling. Be patient and allow the proper curing time to ensure a flawless finish.
5. Painting in Humid or Dusty Environments
Humidity can lengthen drying time and cause the paint to bubble or fail to adhere correctly. On the other hand, dusty areas can leave particles on the wet paint, creating a rough, unprofessional texture. Ideally, paint your cabinets in a clean, dry space where humidity levels are between 40–60%. Studies show that controlling environmental factors during painting can improve the durability and finish significantly.
By avoiding these common mistakes and following best practices, you can achieve a professional-quality cabinet painting project that looks great and lasts for years.
Transform Your Kitchen One Brush Stroke at a Time
Painting your wood kitchen cabinets is one of the easiest and most affordable ways to dramatically update your kitchen. By following these steps and tips, you’ll achieve a professional-looking finish that enhances the overall style of your space. And remember, patience and preparation are key to a beautiful result.
Want more kitchen inspiration, expert advice, or refinishing services? Visit Kabinetry.ca to explore how you can bring your dream kitchen to life! Whether you’re after DIY tips or professional refinishing, Kabinetry has you covered.