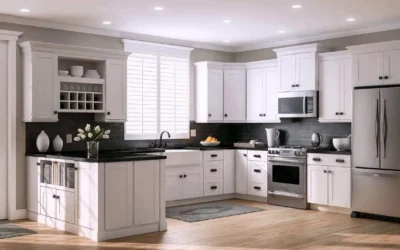
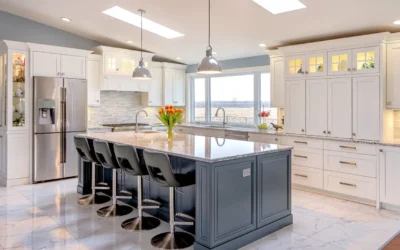
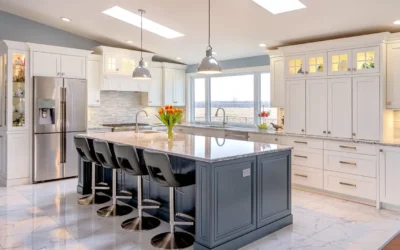
Are you tired of staring at old, outdated kitchen cabinets but don’t want to spend a fortune on a full remodel? Here’s a little secret from the team at Kabinetry.ca. learning how to stain kitchen cabinets is an easy and budget-friendly way to give your kitchen a fresh, stunning makeover.
Imagine deep, rich tones that add warmth and character, or light, airy finishes that brighten up your space—either way, the right stain can completely transform your cabinets.
Follow this simple 2-day DIY plan, suitable for any type of stain, and enjoy gorgeous, long-lasting results that will make your kitchen feel brand new.
Why Staining Kitchen Cabinets Is Worth It?
Updating your kitchen doesn’t always mean replacing every cabinet. Staining kitchen cabinets is a smart, cost-effective way to breathe new life into your space. A fresh stain can instantly change the mood of your kitchen—dark, rich tones add warmth and elegance, while lighter shades make the area feel open and airy.
Beyond aesthetics, staining also protects your wood cabinets, enhancing their durability for years to come.
Compared to buying brand-new cabinets, this DIY-friendly project saves you both time and money, making it one of the most rewarding home improvements you can tackle over a single weekend.

Organizing Your Cabinet Staining Project for the Weekend
If you want your cabinet staining project to go smoothly, planning ahead is key.
- Start by taking a good look at your kitchen cabinets. Are they solid wood like oak, maple, or cherry? These types absorb stain beautifully.
- Notice any scratches, dents, or greasy spots that might need extra cleaning or sanding. Checking the condition of your cabinets before you start will save time and prevent surprises later.
- Next, create a practical weekend schedule. Dedicate the first day to preparation: remove doors and hardware, clean and sand the surfaces, and tape off areas that need protection.
- On the second day, focus on applying the stain and finishing touches like protective coatings and reassembling your cabinets.
- Pay attention to drying times—rushing can cause patchy color or sticky finishes.
Just keep in mind that larger kitchens or working solo may require additional time—but with proper planning, you’ll enjoy beautiful, long-lasting results by the end of the weekend.
Step-by-Step Guide: How to Stain Kitchen Cabinets
Giving your kitchen cabinets a fresh new look doesn’t have to be complicated. With the right approach, you can achieve professional-looking results in just a weekend. Here’s a simple, step-by-step guide:
- Remove Doors and Hardware
Start by taking off all cabinet doors, drawers, and hardware. Label each piece so you’ll know exactly where it belongs when reassembling. Removing handles and hinges makes it easier to stain evenly and keeps your hardware safe from accidental drips.
- Clean and Prep the Surfaces
Clean every surface thoroughly to remove grease, dust, and grime. For stubborn sticky spots, a gentle degreaser works wonders. Then, lightly sand the wood to create a smooth surface that the stain can easily absorb. If your cabinets are painted or heavily varnished, you may need to strip them down to bare wood for the best results.
- Apply a Wood Conditioner (Optional)
Using a wood conditioner helps prevent blotchy or uneven stains, especially on softwoods or wood with varying grain patterns. This step ensures a smooth, consistent finish.
- Stain the Cabinets
Apply your chosen stain along the direction of the wood grain using a brush or cloth. Let it sit for a few minutes to reach the desired color, then wipe off the excess. Multiple coats may be applied for a deeper shade, but make sure to allow adequate drying time—usually 18–24 hours between coats.
- Seal and Protect
After the stain dries completely, apply a clear protective finish or polyurethane. This layer safeguards your cabinets from scratches, moisture, and daily wear while enhancing the richness of the stain.
- Reassemble and Enjoy
Once the protective coat is fully cured, reattach all doors, drawers, and hardware. Step back and admire your beautifully transformed kitchen—fresh, vibrant, and completely renewed.
With careful preparation, patience, and attention to detail, staining your kitchen cabinets is not only achievable but also a highly satisfying weekend DIY project.
Modern Kitchen Cabinet Stain Colors
Updating your kitchen with a modern look starts with choosing the right cabinet stain. Here are some popular options and trends for modern kitchens:
- Soft Neutrals – Shades like gray, taupe, or driftwood create a clean, sophisticated feel while letting the natural wood grain shine.
- Dark and Dramatic – Deep charcoal, navy, or black-stained cabinets add contrast and elegance, especially when paired with lighter countertops or brass hardware.
- Two-Tone Finishes – Combining stained lower cabinets with painted upper cabinets adds depth and visual interest without overwhelming the space.
- Natural Wood Tones – Light honey or maple stains can make smaller kitchens feel more open and inviting, while keeping a modern, minimalist vibe.
- Balancing Colors – Modern stain colors should harmonize with countertops, flooring, and wall colors to create a cohesive and stylish kitchen design.
By following these trends, you can choose a modern cabinet stain color that refreshes your kitchen, enhances your style, and stands the test of time.
Best Stain for Kitchen Cabinets
Choosing the right stain is essential to achieving a beautiful, long-lasting finish for your kitchen cabinets. Here are some of the best options to consider:
- Oil-Based Stains – Known for their rich, deep colors and durability, oil-based stains penetrate the wood deeply and bring out the natural grain. They are ideal for high-traffic kitchens but require good ventilation during application.
- Water-Based Stains – These stains dry faster, have lower odor, and clean up easily with soap and water. They’re perfect for lighter, more modern finishes and provide excellent color consistency.
- Gel Stains – Gel stains are thick and ideal for cabinets with uneven or blotchy wood. They sit on top of the surface, giving you more control over color intensity and reducing the risk of streaks.
- Hybrid or Poly-Stains – Combining stain and protective finish in one, these products save time and offer a durable finish, though they may require more careful application.
When choosing the best stain, consider your kitchen’s style, the type of wood, and how much wear and tear your cabinets endure. Testing a small sample area first is always recommended to ensure the color and finish meet your expectations.
Final Tips for a Successful Kitchen Cabinet Staining Project
Staining your kitchen cabinets can be incredibly rewarding, but a few final tips will help ensure a smooth and beautiful result:
- Take Your Time – Rushing any step, from sanding to staining to sealing, can lead to uneven color or sticky surfaces. Patience is key.
- Test Before Committing – Always try your stain on a small, hidden area to see how the wood reacts and to make sure the color matches your vision.
- Work in a Well-Ventilated Area – Proper airflow helps stains and finishes dry evenly and reduces exposure to fumes.
- Use Quality Tools – High-quality brushes, cloths, and sanding materials make a noticeable difference in the final result.
- Follow Drying Times – Allow enough time between coats of stain and protective finish to ensure durability and a smooth, professional look.
- Protect Your Work – Apply a clear protective coat or polyurethane to keep your cabinets looking fresh and to guard against everyday wear and tear.
- Label Everything – When removing doors and hardware, label each piece to make reassembly easier and stress-free.
By following these tips, your cabinet staining project will not only be manageable but also highly satisfying, leaving your kitchen transformed and ready to enjoy.
Updating your kitchen doesn’t have to be expensive. With proper planning and the right stain, you can transform your cabinets in a single weekend.
For guidance, materials, and inspiration, Kabinetry.ca is a trusted resource to help you achieve stunning, lasting results. Contact us today for a free consultation – your dream cabinets start here.
FAQs
1. How long does it typically take to stain kitchen cabinets?
A complete cabinet staining project usually takes 2-4 days. The process includes preparation, cleaning, sanding, staining, and sealing. Allow adequate drying time between coats for the best results.
2. What type of wood works best for staining kitchen cabinets?
Solid wood cabinets, particularly those made of oak, maple, or cherry, are ideal for staining. These woods accept stain well and allow the natural grain to show through, enhancing the overall appearance.
3. Is it necessary to apply a wood conditioner before staining?
Yes, applying a wood conditioner is highly recommended, especially for softwoods like pine. It helps prevent blotchy stain application by partially sealing the wood’s pores, resulting in more even stain absorption and a professional-looking finish.
4. What’s the best way to protect newly stained cabinets?
Applying a durable sealant, such as polyurethane, is crucial for protecting stained cabinets. This creates a barrier against moisture, scratches, and everyday wear. Choose between oil-based or water-based polyurethane, depending on your preferences for drying time and long-term appearance.
5. Can I stain my cabinets without removing the doors?
While it’s possible to stain cabinets without removing the doors, it’s not recommended. Removing doors and hardware allows for better access to all surfaces, resulting in a more even application of stain and a professional-looking finish. It also prevents potential damage to hinges and other hardware during the staining process.


